



Proper care for embroidered military apparel comes down to a short, repeatable checklist: turn the garment inside out, zip or button all closures, place it in a mesh laundry bag, wash on cold with a mild detergent on the delicate cycle (or hand wash), skip bleach and fabric softener entirely, air dry flat or on a padded hanger, and inspect the stitching after every wash. Follow those steps consistently and your patches, insignia, and embroidered details will hold their shape, color, and structure through years of wear. According to embroidered clothing care guidance, turning garments inside out and using cold water on a delicate cycle are the two most protective habits you can build.
Key Takeaways
Consistent cold-water washing, inside-out placement in a mesh bag, air drying, and post-wash inspection are the four habits that protect embroidered military apparel from the most common damage.
| Point | Details |
|---|---|
| Wash cold, inside out | Turn garments inside out, use cold water on delicate cycle, and place in a mesh laundry bag every wash. |
| Skip bleach and softener | Both degrade thread fibers and backing adhesives; use only mild, non-bleach detergent. |
| Air dry flat | Lay flat on a towel or mesh rack; avoid high-heat drying that distorts stitching and degrades factory treatments. |
| Inspect and repair promptly | Check stitch tension and patch edges after every wash; trim loose threads and seal with fray sealant immediately. |
| Store with acid-free materials | Use breathable covers for short-term storage and acid-free tissue in acid-free boxes for long-term archival care. |
Table of Contents
- Quick dos and don’ts for everyday handling
- How to wash embroidered uniforms: hand wash vs. machine wash
- How to remove stains from embroidered areas safely
- Safe drying techniques that protect stitch tension
- How to iron embroidered areas without damaging them
- When to choose professional cleaning for embroidered pieces
- Inspection and basic repairs that extend garment life
- Special care for factory-treated uniforms and sewn-on patches
- How to store embroidered military apparel safely
- Why care is an act of honor: Modern Day Knight’s perspective
- Stain guidance specific to military apparel materials
- How to prevent color bleeding and fading in patches and fabric
- Maintaining garment shape and structure during washing and drying
- Sources
Quick dos and don’ts for everyday handling
Protecting embroidered military gear starts before you ever reach the laundry room. Daily handling habits matter as much as wash technique.
Do:
- Check the manufacturer’s care label first. It governs the garment; embroidery just needs extra precautions on top of it.
- Pre-inspect before every wash. Catch a loose thread now and you spend 30 seconds fixing it. Miss it and you lose a patch.
- Spot-treat gently with a damp cloth before tossing the whole garment in the wash.
- Hang heavier pieces (hoodies, jackets) on padded hangers. Fold lighter tees flat to avoid hanger marks on embroidered chest panels.
- Remove detachable name tapes or hook-and-loop patches before washing when the design allows it.
Don’t:
- Use chlorine bleach, oxygen bleach, or harsh stain removers directly on embroidered areas.
- Leave embroidered garments in direct sunlight for extended periods. UV exposure fades thread color faster than washing does.
- Scrub embroidered panels with a brush or rough cloth.
- Use fabric softener. It coats thread fibers and dulls the texture over time.
Pro Tip: Store a small lint roller near your gear. A quick pass before hanging removes surface debris that would otherwise grind into thread fibers during the next wash.
How to wash embroidered uniforms: hand wash vs. machine wash
Choosing the right method depends on three factors: the fabric type, how dense or raised the embroidery is, and whether the garment carries a factory treatment like permethrin.
| Factor | Hand Wash | Machine Wash |
|---|---|---|
| Embroidery density | High density, raised, or 3D | Standard flat embroidery |
| Garment value | High-value, irreplaceable | Everyday wear |
| Fabric sensitivity | Delicate blends, wool, ripstop | Cotton, poly-cotton blends |
| Factory treatment present | Preferred to extend treatment life | Acceptable with cold/delicate settings |
Hand-wash steps
- Fill a clean basin with cool water. Lukewarm is acceptable; hot is not.
- Add a small amount of mild, non-bleach detergent and dissolve it before adding the garment.
- Submerge the garment inside out and agitate gently with your hands for two to three minutes.
- Let it soak no longer than ten minutes.
- Rinse thoroughly under cool running water until no detergent remains.
- Press water out by rolling the garment in a clean dry towel. Never wring.
Machine-wash steps
- Turn the garment inside out and fasten all closures.
- Place it in a mesh laundry bag to reduce abrasion against other items.
- Select the delicate or gentle cycle with cold water.
- Add a mild detergent. Avoid any formula containing bleach or optical brighteners if the care label warns against them.
- Keep the load small. Crowding increases friction on embroidered panels.
- Remove promptly when the cycle ends.
Brand uniform guidance recommends pre-inspecting garments, turning them inside out, using a mesh bag, and air drying when possible as the core machine-wash protocol. For garments with heavy patches, raised embroidery, or sequins, reinforce the backing with a small tacking stitch before washing or remove the patch entirely if it detaches cleanly.
Pro Tip: Wash embroidered pieces with like colors and similar fabrics. Pairing a cotton tee with rough denim or towels increases abrasion and can pull thread loops loose within a single cycle.
How to remove stains from embroidered areas safely
Test any stain remover on a hidden seam or interior hem before applying it near embroidery. Thread dyes and backing materials react differently to chemicals, and a ruined patch cannot be untested.
Gentle options that work:
- A few drops of mild dish soap diluted in cool water handles most everyday stains.
- White vinegar diluted 1:1 with water lifts light odor and surface grime without harming most thread types.
- A dilute enzyme-based pre-treater applied carefully and rinsed quickly can address protein-based stains like blood or sweat.
Stain-specific steps:
- Oil or grease: Blot excess with a clean cloth, apply a small amount of diluted dish soap, let it sit two minutes, then dab and rinse. Do not rub.
- Blood: Use cold water only. Warm water sets blood protein. Dab with a cold damp cloth, apply diluted enzyme cleaner if needed, rinse cold.
- Ink: Dab with rubbing alcohol on a cotton swab, working from the outside of the stain inward. Rinse immediately.
- Mud: Let it dry completely first. Brush off the dried crust gently, then spot-clean with mild detergent solution.
Embroidered patch care guidance is clear: avoid vigorous scrubbing, soak gently, dab stains rather than rub, and always test removers on an inconspicuous spot first.
What to avoid entirely: chlorine bleach, petroleum-based solvents, acetone, and stiff-bristle brushes. All four can dissolve adhesive backings, strip thread color, or pull stitches loose.
Safe drying techniques that protect stitch tension
How you dry an embroidered garment matters as much as how you wash it. Heat and mechanical stress during drying are the two most common causes of distorted embroidery.
- After washing, gently press the garment between two clean dry towels to absorb excess water.
- Reshape embroidered panels by hand while the fabric is still damp. This is the easiest moment to correct any distortion.
- Lay the garment flat on a clean dry towel or a mesh drying rack. Flat drying prevents gravity from stretching embroidered panels out of shape.
- If hanging is necessary, use a padded hanger and smooth the embroidered areas flat before hanging.
- Keep the garment away from direct sunlight and heat sources while drying.
- If you must use a dryer, select the lowest heat setting and remove the garment while it is still slightly damp. Finish drying flat.
- Avoid high-heat tumble drying. It shrinks thread backing, distorts raised embroidery, and can melt adhesive on iron-on patches.
- Never hang a wet, heavily embroidered jacket or hoodie by the collar. The weight of the wet fabric will pull the embroidered panel downward and warp the stitching.
- For thick patches or multi-layer embroidery, allow extra drying time. Moisture trapped beneath a patch backing leads to mildew and adhesive failure.
How to iron embroidered areas without damaging them
Direct heat on embroidery flattens raised stitching, melts synthetic threads, and can bond adhesive backings permanently to the iron plate. The fix is simple: never iron directly on the embroidered surface.
- Always turn the garment inside out before ironing embroidered sections, or place a clean pressing cloth between the iron and the embroidery.
- Use low to medium heat. Test on a hidden seam first.
- Avoid steam directly on embroidery. Moisture combined with heat can cause thread dyes to bleed into the surrounding fabric.
- If the embroidery is raised or three-dimensional, skip the iron entirely and use a handheld garment steamer held at least two inches away.
- Do not iron permethrin-treated fabrics on high heat. The treatment is heat-sensitive, and high temperatures can degrade its protective properties.
Garment care guidance specifies ironing embroidery on the reverse side between cloths and avoiding wringing or rubbing embroidered areas. That standard applies to military-style pieces just as it does to any embroidered uniform.
Pro Tip: A pressing cloth does not need to be special. A clean cotton pillowcase works perfectly and protects both the embroidery and the iron plate.
When to choose professional cleaning for embroidered pieces
Some garments earn a trip to a professional cleaner. Knowing when to make that call protects pieces that home care cannot safely handle.
Situations that justify professional cleaning:
- Complex or set-in stains on high-value pieces where home treatment risks permanent damage.
- Delicate fabric blends (wool, silk-blend dress uniforms) where machine washing is too aggressive.
- Garments with multiple large sewn-on patches where backing integrity is uncertain.
What to tell the cleaner:
- Point out every embroidered area, patch, and name tape before they process the garment.
- Mention any factory treatments, including permethrin, and ask them to avoid solvents, starch, and high-heat pressing.
- Request a spot-test on a hidden area before full treatment.
- Ask specifically for a gentle, low-heat process and confirm they will not press directly on embroidered panels.
Dry-cleaning cautions:
- Some dry-cleaning solvents dissolve the adhesive backing on iron-on patches.
- Starch stiffens thread fibers and accelerates wear.
- High-heat pressing in commercial presses can flatten raised embroidery permanently.
Army Times guidance on ACU care warns against bleach, starch, and dry cleaning on combat uniforms, recommending cold-water detergent and avoiding high heat to preserve both color and functional treatments.
Inspection and basic repairs that extend garment life
A two-minute inspection after every wash catches problems when they are still easy to fix. Run through this checklist:
- Stitch tension: Look for loops, pulls, or areas where thread has gone slack.
- Backing integrity: Press gently on each patch. If it flexes or lifts at the edges, the backing needs attention.
- Edge lift: Check patch perimeters for thread separation or adhesive failure.
- Discoloration: Note any color bleeding from thread onto the surrounding fabric.
Basic repair options:
- Loose thread: Trim it cleanly with small scissors. Do not pull. Then apply a tiny drop of fabric fray sealant to the cut end.
- Lifted patch edge: Use a small amount of fabric adhesive applied with a toothpick under the lifted edge. Press firmly and let it cure flat for several hours.
- Separated stitching: A few small hand-sewn tacking stitches with matching thread secure the area without altering the appearance.
Embroidery experts recommend periodic inspection and simple repairs, specifically trimming loose threads and using minimal fabric adhesive or small tacking stitches to stop fraying before it becomes permanent damage.
When a patch has lifted more than halfway or the backing has deteriorated, re-sewing or replacing it is the right call. A starter repair kit worth keeping: small scissors, a needle and matching thread, fabric fray sealant, and a small tube of fabric adhesive.
Pro Tip: Keep your repair kit in a small zip pouch with the garment’s care label taped inside. When you need it, you will have the thread color and care instructions in one place.
Special care for factory-treated uniforms and sewn-on patches
Factory-treated uniforms, particularly those treated with permethrin under the DoD Insect Repellent System, require a specific approach. The treatment is bonded into the fabric fibers during manufacturing and is designed to last through many washes across the expected service life of the uniform. Washing it incorrectly does not just damage the fabric; it degrades a protective function.
Key rules for treated uniforms:
- Wash in cold water with a mild detergent.
- Tumble dry on low heat or air dry.
- Do not dry clean, starch, or use bleach.
- Do not reapply permethrin to a factory-treated uniform. The factory process bonds the treatment at a concentration and depth that consumer spray products cannot replicate, and layering them creates no added benefit.
Air Force guidance confirms that regular detergents, including those with optical brighteners, are authorized for ABUs, while still advising against fabric softeners and bleach and recommending low-heat tumble drying when air drying is not possible.
Sewn-on patches on treated uniforms interact with the treated fibers at their edges. Avoid pulling or re-sewing patches without cause, as needle holes in treated fabric can create small gaps in the treatment layer. When a patch genuinely needs reattachment, a professional with experience in military uniform repair is the right choice.
How to store embroidered military apparel safely
Storage is where most long-term damage happens. Mildew, yellowing, and thread degradation are almost always preventable with the right conditions.
Short-term storage (weeks to months):
- Hang on padded hangers inside breathable garment covers. Avoid wire hangers, which distort shoulders and stress embroidered chest panels.
- Keep away from direct sunlight. UV exposure yellows fabric and fades thread color even through a window.
- Allow airflow. Sealed plastic bags trap moisture and create the conditions for mildew.
Long-term archival storage (months to years):
- Fold garments with acid-free tissue paper between layers to prevent contact yellowing.
- Store in acid-free boxes rather than cardboard, which is acidic and transfers tannins to fabric over time.
- Rotate items periodically to prevent permanent fold creases from setting into embroidered panels.
- Avoid storing against bare wood shelving or acidic papers.
Uniform care guidance recommends acid-free tissue for archival storage to prevent yellowing and advises keeping garments away from direct sunlight and acidic materials.
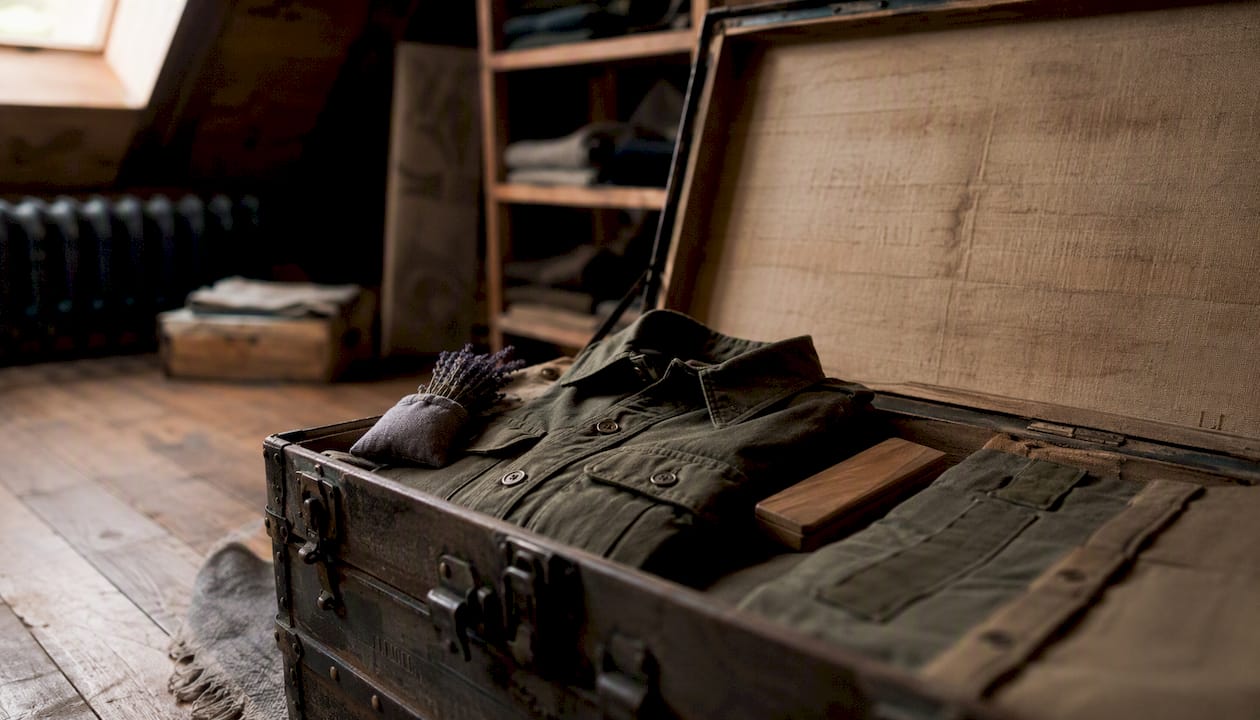
Pro Tip: Slip a cedar block or a small sachet of lavender into the storage box. Both deter moths without the chemical residue that mothballs leave on fabric and thread.
Why care is an act of honor: Modern Day Knight’s perspective
At Moderndayknightco, we believe that how you care for what you wear reflects what you stand for. Embroidered insignia and military-inspired details are not decoration. They are symbols of service, sacrifice, and a code of values that deserves to be preserved. Treating those symbols with the same discipline you bring to everything else is not optional. It is part of the code.
Moderndayknightco is veteran-owned and built around a simple conviction: integrity shows up in the details. That extends to how you maintain the gear that represents your values. Apparel that honors military service carries meaning beyond its materials, and proper care is how you protect that meaning over time.
- Proper laundering preserves both the appearance and the functional integrity of embroidered pieces.
- Regular inspection is a discipline, not a chore. It reflects the same attention to readiness that defines military culture.
- Choosing quality care products and methods is consistent with choosing quality gear in the first place.
For product-specific care guidance on Moderndayknightco pieces, the heavy-duty garment care guide covers cleaning and maintenance for the brand’s embroidered apparel in detail.
Stain guidance specific to military apparel materials
Military fabrics, including ripstop nylon, poly-cotton blends, and treated canvas, respond differently to stains than standard cotton does. Thread types matter too: rayon embroidery thread bleeds more readily than polyester, and metallic threads require extra caution with any liquid treatment.
Ripstop and treated fabrics: Blot immediately. These fabrics resist absorption, so quick action usually lifts the stain before it sets. Avoid soaking treated ripstop for extended periods.
Poly-cotton blends: Most water-based stains respond well to a diluted mild detergent solution applied with a clean cloth. Oil-based stains need a degreasing agent applied sparingly and rinsed quickly.
Embroidery thread types:
- Rayon thread: use cold water only and avoid enzyme cleaners, which can weaken rayon fibers.
- Polyester thread: more durable; handles mild enzyme cleaners and cool water well.
- Metallic thread: dab only with a barely damp cloth. Any liquid treatment risks tarnishing or unraveling the metallic wrap.
The consistent rule across all fabric and thread types: dab, never scrub, and rinse thoroughly to remove all detergent residue.
How to prevent color bleeding and fading in patches and fabric
Color loss in embroidered military apparel comes from two sources: dye bleeding during washing and UV-driven fading during wear or storage. Both are preventable.
Preventing bleed:
- Wash new embroidered garments separately for the first two or three washes. New thread dyes, especially on dark or saturated patches, can bleed onto lighter fabric during initial washes.
- Cold water is your primary defense. Hot water opens fabric fibers and releases dye. Cold water keeps fibers contracted and dye locked in.
- Add a cup of white vinegar to the rinse water for the first wash of a new piece. Vinegar helps set thread dyes without harming fabric.
- Avoid soaking embroidered items for long periods. Extended water contact loosens dye bonds.
Preventing fade:
- Store away from windows and direct light sources.
- Wash inside out. The embroidered surface faces away from agitation and friction during the cycle.
- Use a detergent formulated for colors rather than a brightening formula when the care label permits it.
Maintaining garment shape and structure during washing and drying
Structure loss is subtle and cumulative. A military jacket or hoodie that loses its shoulder shape or collar structure after a few washes looks worn even when the embroidery is intact.
Turn every garment inside out before washing. This single step protects embroidered surfaces from direct agitation and reduces the friction that distorts collar and cuff edges. A mesh laundry bag adds a second layer of protection, keeping the garment from tangling with other items and stretching at stress points. Washing embroidered clothing with like colors in a mesh bag reduces both abrasion and color transfer in a single step.
Reshape immediately after washing, while the fabric is still damp. Smooth collar points, straighten cuffs, and press embroidered panels flat by hand. Once the garment dries in a distorted shape, heat-setting it back requires ironing, which carries its own risks for embroidered areas.
For hoodies and structured jackets, lay flat to dry rather than hanging. Wet fabric is heavy, and gravity pulls shoulder seams and embroidered chest panels downward during hang drying. A flat mesh rack distributes the weight evenly and preserves the garment’s original silhouette.
The bottom line on care priorities
The checklist at the top of this guide is not complicated. Cold water, gentle cycle, inside out, mesh bag, air dry, inspect. Run that routine consistently and your embroidered military apparel will hold its look and its integrity for years. This week: pull out one piece, check the stitching, and wash it by the checklist. Note any repairs needed and address them before the next wear. For product-specific questions or care advice on Moderndayknightco pieces, explore the full apparel collection and reach out directly through the brand’s site.
Sources
The following sources were used to build this guide. Each one is worth bookmarking for ongoing reference.
- DoD Insect Repellent System (permethrin-treated uniforms guidance)
- Airmen can use regular detergent on ABUs
- Care Instructions for Embroidered Garments (garment care PDF)
- How to Wash and Maintain Embroidered Work Uniforms
- How to care for and clean your embroidered patches
- How to Care for Embroidered Clothing (So It Looks Great for Years)
- How to Care for and Maintain Your Embroidered Patches?
Recommended
- Care for Heavy-Duty Lifestyle Garments: Your 2026 Guide – Modern Day Knight
- How Apparel Honors Military Service: A Values Guide – Modern Day Knight
- Military Values in Modern Fashion: What to Wear and Why – Modern Day Knight
- Military-Inspired Apparel: A Lifestyle Statement of Honor – Modern Day Knight


