



Reflective inks work by loading tiny glass microspheres into a print carrier so light bounces straight back at its source, which is why a shirt looks flat until a headlight or a flash hits it. The one rule that separates a print that glows from a print that disappoints is to let the carrier sink and keep the beads exposed on the surface. That means minimal basing, a single heavy print stroke, the right mesh, and squeegee pressure most plastisol jobs would call excessive.
TL;DR:
- Using a single heavy stroke with a coarse mesh and high squeegee pressure improves retroreflectivity by exposing glass beads on the surface.
- Open-weave cotton and blended fabrics offer the best surface for bead adhesion, while tightly woven or coated materials often require adhesion promoters or transfer applications.
- Skip the white underbase whenever possible and avoid multiple passes, as extra layers bury the beads and significantly reduce reflectivity.
- Catalyzed two-part systems require precise mixing and quick usage within pot life to prevent beads from settling or losing effectiveness.
- Reflective designs should be bold and thick, as fine details and gradients tend to diminish reflectivity, especially under multiple print passes.
Table of Contents
- What Is Reflective Ink Printing and How Does It Work?
- Which Fabrics and Substrates Work Best for Reflective Ink?
- What Press Settings Give the Best Reflectivity?
- How Do You Mix and Cure Reflective Ink Correctly?
- What Design Choices Work Best for Reflective Prints?
- How Reflective Printing Choices Shape the Finished Garment
- What the Industry Gets Wrong About Reflective Printing
- Where Reflective Accents Fit in Modern Day Knight’s Lineup
- Manufacturer Bulletins and Trade Resources Worth Bookmarking
- Sources
- FAQ
What Is Reflective Ink Printing and How Does It Work?
Retro-reflective ink carries thousands of microscopic glass beads suspended in a clear or lightly tinted carrier. When light hits a bead, it refracts through the glass, bounces off a reflective backing layer, and returns almost directly to the source. That is why a reflective logo on a jacket looks dull gray in daylight but throws back a phone flash like a mirror at night. Glow-in-the-dark printing works on a different principle: phosphorescent pigments absorb ambient light and release it slowly, producing a soft glow rather than a directional bounce. Do not confuse the two when a client asks for “reflective printing.”
Shops typically choose between a few product formats:
- One-part, ready-to-use reflective ink for straightforward direct printing with no mixing.
- Two-part systems requiring a coupler or catalyst for bead adhesion and wash durability.
- Tintable clear reflective bases that let you shift color but sacrifice some brightness.
- Reflective transfers, factory-made with aligned beads that outperform direct prints, sometimes by 5 to 10 times in retroreflective brightness.
Screen printing generally beats DTF for reflectivity because the screen can deposit a thicker, particle-loaded layer than a film transfer can hold.
Which Fabrics and Substrates Work Best for Reflective Ink?
Open-weave 100% cotton and common 50/50 cotton-poly blends give reflective ink the best surface to grab, according to manufacturer fabric guidance for reflective product bulletins. Tightly woven nylons and some coated polyesters resist bead adhesion and often need an adhesion promoter or a switch to transfer application instead of direct printing.
Before any production run:
- Degrease and test a swatch of the actual fabric lot, not a reference sample.
- Skip the white underbase whenever possible. Printing reflective ink over a heavy base buries the beads and kills reflectivity.
- If a base is unavoidable on a dark, loosely woven garment, keep it as thin as the fabric allows.
- Check reflective sheeting or vinyl substrates separately. Direct ink over vinyl rarely performs as well as a purpose-built reflective transfer.
- Compare tri-blend against straight cotton before committing a full order, since fiber content changes both shrinkage and how well beads seat into the weave, as covered in Modern Day Knight’s tri blend versus cotton breakdown.
What Press Settings Give the Best Reflectivity?
Forget the multi-pass habits of standard plastisol work. Reflective ink rewards a heavier, simpler stroke.
- Set up a coarser mesh, typically starting near 110 to 140 tpi depending on the manufacturer’s bead size, so beads can pass through without shearing off.
- Use a sharp-edged, high-durometer squeegee.
- Flood once, then print with a single, heavy squeegee stroke at maximum practical pressure. This lets the ink vehicle sink into the fabric while the beads stay exposed on top.
- Skip the print-flash-print sequence entirely. A second pass adds vehicle on top of the beads instead of improving coverage.
- Cure per the manufacturer’s temperature and dwell time, then pull a sample under a flashlight before running the full order.
Pro Tip: Keep a squirt bottle of reducer at your station and stir the ink every few prints. Reflective microspheres settle out of the carrier quickly, and a batch that sat untouched for twenty prints will look noticeably dimmer than the first pull.
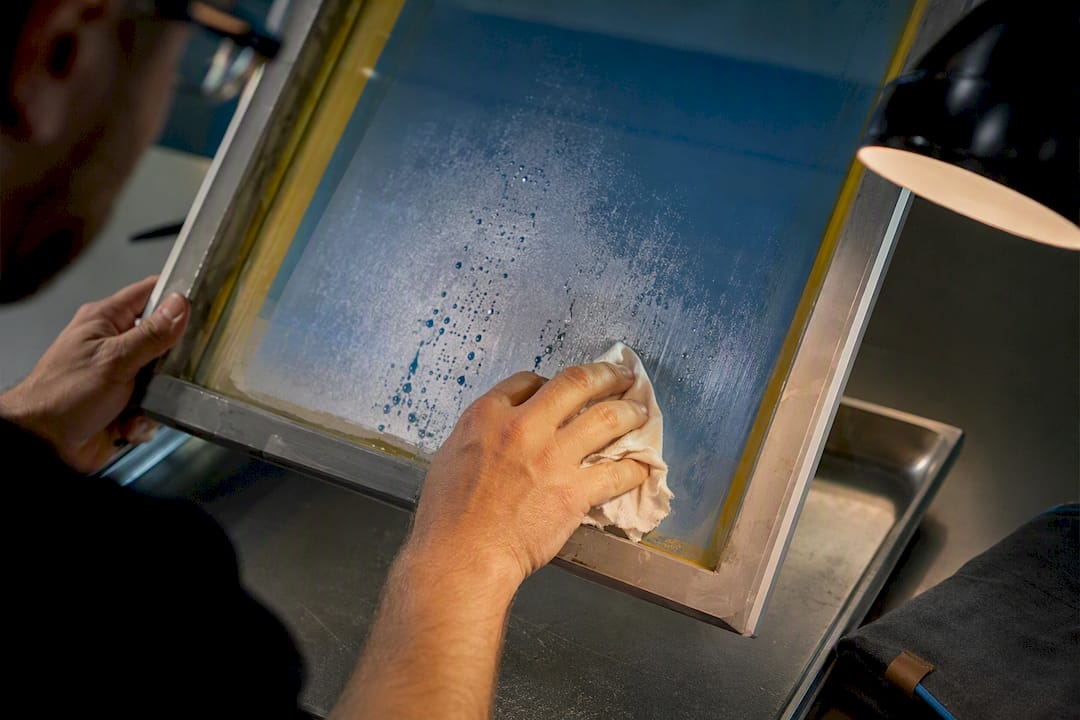
Watch your screen for clogging. Beads that shear off during printing can lodge in the mesh openings, and a quick pause to clean the underside of the screen saves you from a slow reflectivity drop across a run nobody notices until the last twenty shirts.
How Do You Mix and Cure Reflective Ink Correctly?
Not every reflective ink needs a coupler, but many two-part systems do. Skipping it when the bulletin calls for one is the fastest way to lose beads in the wash. Manufacturers who require a coupler typically call for a small addition, often in the 1 to 5% by weight range, and pot life after catalyzation can shrink to a matter of hours.
Statistic Callout: A catalyzed reflective ink batch can go from print-ready to unusable in the same shift. Mix only what you will run before it thickens past the point of laying down evenly.
Practical mixing and curing rules worth posting at the press:
- Follow the bulletin’s exact coupler ratio. Do not eyeball it.
- Batch small, especially on catalyzed systems, and plan your print order around pot life.
- Cure at the temperature the bulletin specifies. Overheating can tackify the carrier or scorch the reflective backing on beads.
- Avoid spot-flashing between passes on reflective ink. It is rarely needed and can bake the surface before the vehicle has fully sunk in.
- Run a wash test on a swatch before shipping any bulk order.
What Design Choices Work Best for Reflective Prints?
Reflective ink punishes fine detail. Halftones, soft gradients, and thin line art lose most of their bounce because the microspheres need an unbroken, reasonably thick deposit to sit correctly. Bold shapes, thick outlines, and solid fills hold up far better under both flashlight and daylight viewing, a point technical notes on microsphere performance back up directly. If a client wants a tinted reflective base for color matching, know that added colorant reduces brightness. The clearer the base, the stronger the bounce.
Run this test protocol before any production run:
- Print a swatch using your planned mesh, pressure, and stroke sequence.
- Check reflectivity with a focused flashlight or phone light in a dim room.
- Run one full wash and dry cycle per the garment’s care instructions.
- Recheck reflectivity and inspect for adhesion loss or cracking.
- If the design needs safety-grade, high-intensity reflection, such as workwear or outdoor gear, switch to a reflective transfer instead of direct printing. Adding a second print layer to boost coverage tends to backfire, since extra vehicle covers the very beads doing the reflecting.
How Reflective Printing Choices Shape the Finished Garment
Some apparel brands build their products around a code and extend that philosophy to how prints hold up under various lighting conditions; for insights on material finishes and aftercare, see soorten maatwerk leer afwerkingen voor jassen. A reflective element on a piece meant to represent honor and service ideally should perform consistently over time. That means the press decisions covered above, mesh, stroke, coupler ratio, cure temperature, are not just technical footnotes. They decide whether a design still bounces light back after a dozen wash cycles or fades into a dull gray patch.
Customers who buy into a values-driven brand often notice such details. A print that peels or dims fast undercuts the message on the shirt. For care instructions that protect reflective elements and heavy-duty prints alike, see the garment care guide, and browse the current apparel and gear lineup to see how these principles show up in finished product.
What the Industry Gets Wrong About Reflective Printing
Most shops treat reflective ink like a specialty plastisol and run their standard print-flash-print sequence out of habit. That habit is the single most common reason reflective jobs come back dim. The research is consistent on this point: extra layers do not add brightness, they hide it. A print-flash-print approach that produces excellent opacity on a standard job produces a lifeless reflective print, because every added pass buries more beads under fresh vehicle.
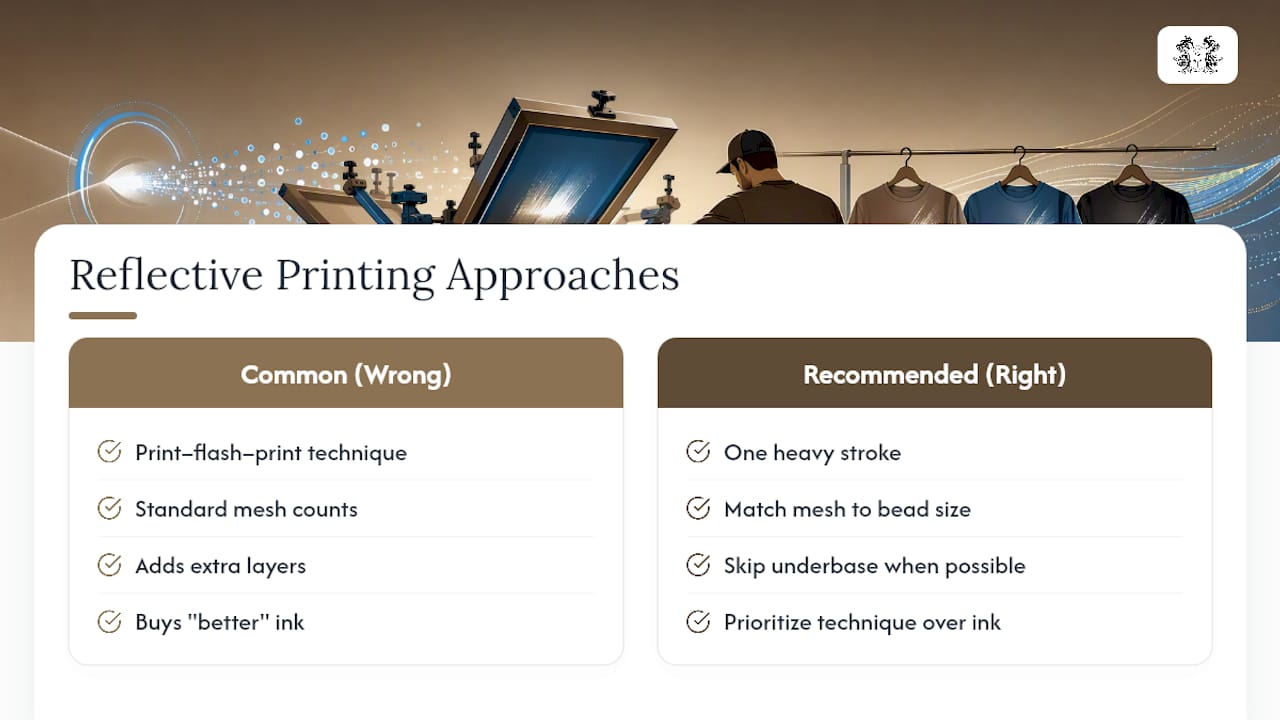
The overrated fix is buying a “better” ink and hoping it solves a technique problem. The underrated fix is simpler: match your mesh to your bead size, commit to one heavy stroke, and skip the underbase whenever the fabric allows it. Shops that treat reflective printing as a discipline rather than a variation on standard printing get consistent results run after run.
If there is one thing to prioritize first, it is walking away from print-flash-print entirely on reflective jobs. Everything else, coupler ratios, cure temps, mesh counts, matters, but none of it compensates for burying the beads under a second pass.
— Modern Day Knight
Where Reflective Accents Fit in Modern Day Knight’s Lineup
Reflective printing is not just for high-visibility workwear. It shows up in small, deliberate accents, packaging trim, merch add-ons, and short promo runs where a brand wants a design that reads different in different light. Some brands offer sticker lines as an easy entry point for incorporating reflective details.
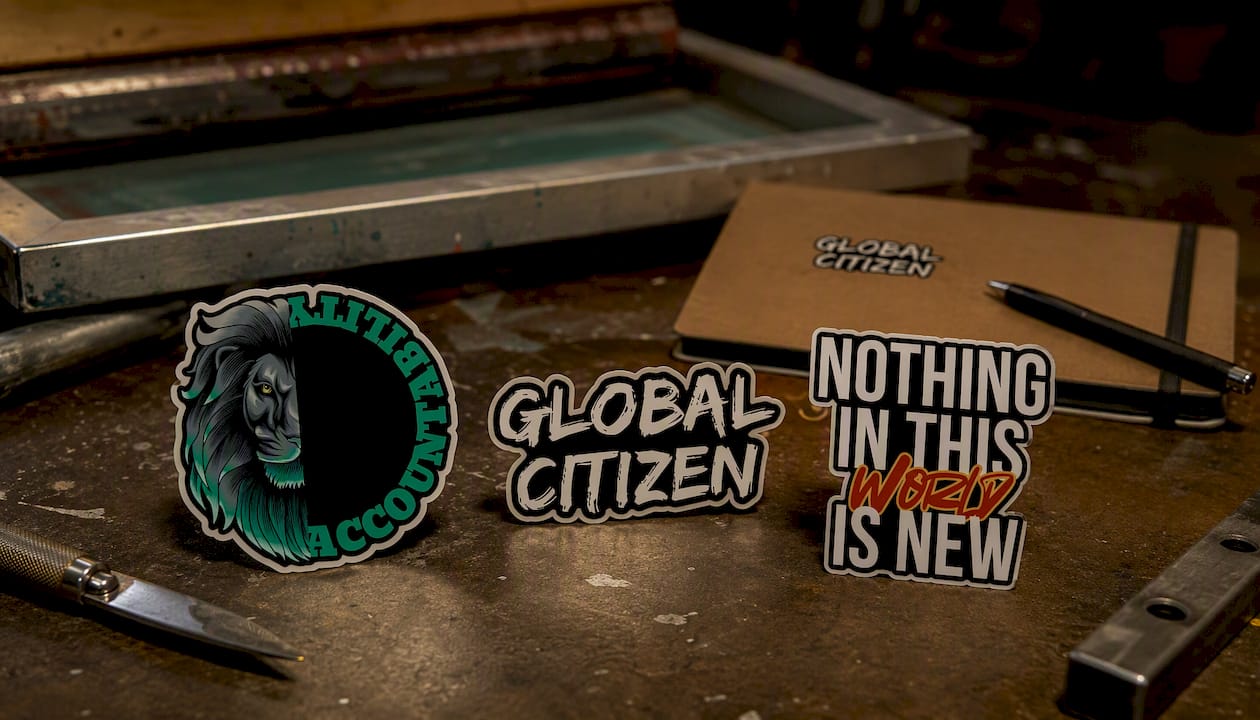
The Accountability Sticker works well as a packaging accent that reinforces the brand’s code without shouting for attention. The Global Citizen Sticker suits a merch add-on for customers who want to represent the movement on a laptop or water bottle. The Nothing In This World Is New Sticker fits a low-friction impulse buy that still carries the brand’s message. All three sit at the entry point of the catalog, an easy way to join what Modern Day Knight stands for before stepping up to apparel. If you run a small shop or promo campaign and want custom production advice, reach out and request samples, or start with one of these three products at checkout today.
Manufacturer Bulletins and Trade Resources Worth Bookmarking
For exact mesh counts, coupler ratios, and cure specs, go straight to the source. The Axeon Enhanced Reflective 1507 Product Bulletin covers mixing ratios and pot-life limits. The ASI Reflectives technical PDF lists fabric compatibility and wash-care specifics. Trade coverage from Images magazine and Impressions magazine rounds out press-side technique guidance not always spelled out in a bulletin.
Sources
- A guide to reflective inks - Images magazine
- Printing basics: Reflective inks - Impressions magazine
- Axeon Enhanced Reflective 1507 Product Bulletin - ICC Ink (PDF)
- ASI Reflectives technical PDF (product bulletin)
FAQ
Is There Reflective Screen Print Ink?
Yes. Reflective screen print ink suspends glass microspheres in a print carrier, and several manufacturers sell it as a one-part ready-to-use ink or a two-part system requiring a coupler.
Is There Any Kind of Ink That Glows or Reflects Light?
Reflective (retro-reflective) ink bounces light directly back at its source using glass beads, while glow-in-the-dark ink uses phosphorescent pigment that absorbs and slowly releases light. They solve different problems and should not be swapped for each other on a job brief.
Which Is Better, Screen Printing or DTF, for Reflective Designs?
Screen printing generally produces stronger retroreflectivity because it can deposit a thicker layer of particle-loaded ink than DTF film allows.
Can You Print Directly on Reflective Vinyl?
Direct ink on reflective vinyl or sheeting is possible but often underperforms compared with a factory-made reflective transfer, since aligned beads in a transfer product outperform beads printed by hand.
Why Did My Reflective Print Turn Out Dim?
The most common cause is too many layers. A heavy underbase or a second print pass buries the microspheres under extra vehicle, which cuts reflectivity instead of improving coverage.


